Sunday, February 25, 2018

Sabre with Camera Switcher

I have the Caddx Micro SDR1 installed on the Sabre's vertical stabilizer now, and I was able to get it setup to switch correctly by moving a switch on the radio. The view is very interesting, and exactly shows the whole main wing.

My one concern is that prop wash and aero-loads on the vertical stabilizer may cause some undesired vibrations in the view. Only flight tests will tell.

The new camera mounted on the tail.

Another view.

Here is the test setup, before I soldered and neatened the wiring up.

Here is the final wiring harness, custom made for this setup.
The camera switcher itself is the circuit board


Saturday, February 24, 2018

New Radio: FrSky Taranis X9D Plus SE

I've had some issues with my DX20 along the way. The most recent being an issue where the power cycled itself off several times on its own while I was preparing for a flight with my Vortex 230. That was scary.

Ever since I got into the more advanced FPV, I've had friends and people on RCGroups telling me to just get a Taranis radio. These are made by FrSky, and offer many advantages, such as tremendous programmability, customizability, and value. These radios run Open-Tx software, which is an open-source, community supported software. It's fairly complicated to learn, and very different than Spektrum.

I finally decided to give it a try and bought the Taranis X9D Plus, Special Edition, in the carbon fiber color.

I also bought an XSR receiver to use with my Vortex 230, as a way to get my feet wet with it.

I haven't had the chance to do any messing around with it yet, but I am looking forward to giving it a try.

The Taranis came in this nice, compact case.

Here's what the radio actually looks like.

Thursday, February 15, 2018

Sabre Upcoming Updates, Schematic

Updated 2/21/18: Updated schematic to reflect actual physical wiring for camera switcher and second camera.

In addition to the updates to the ground station, I will also be updating equipment on the Sabre.

I have more equipment on the way. Two main things:

1. A GPS module called a tBeacon.
This records the latest GPS location from the Vector flight controller, so that if the plane goes down, you can call the tBeacon using a handheld HAM radio. Then the tBeacon verbally communicates the last know GPS coordinates, allowing you to find your plane. It's an item for peace of mind.

2. A camera switcher.
I have a micro FPV camera and camera switcher on the way. I plan to put the new camera looking forward on the vertical stabilizer of the Sabre, allowing a different perspective to enjoy the FPV experience. The camera switcher operates on a channel and will swap between the main camera and the tail camera.

Below is an updated schematic, which reflects the new changes.


New Video Ground Station Schematic

I have some more FPV related equipment on the way. Some of which will “complete” my ground station once it is integrated into the existing version. I have a monitor to add to the setup for a backup display and backup DVR, but the main change is the addition of "diversity."

This is done by adding a second video receiver and the Eagle Eyes diversity module to the setup. The Eagle Eyes module takes whichever of the two video signals is stronger and uses that as the output. This is really handy for using both an omni-direction antenna (such as the Airblade) and a direction antenna (such as the Crosshair) at the same time.

An example is if I was flying out to 5 miles to say, my right side. In this case, I would have the Crosshair aimed in the general direction of the flight, since it's a directional antenna. On the return trip however, I may want to fly behind myself by a couple miles, or even pass myself and go to the left by a mile or two. In this situation, the omni-directional Airblade would have the stronger signal, all while the Crosshair is still aimed to the right. The Eagle Eyes switches between the two automatically, so I should never have to re-aim my ground station from the direction of the long range portion of the flight.

A new schematic follows:

Updated Video Ground Station Schematic

Sunday, January 21, 2018

Vortex 230 FPV Flight

I finally got a chance to make an FPV flight with my quad copter today in an open field.

Here is a video from the DVR:

Video Link

Wednesday, January 17, 2018

New Power Cable in the Sabre

The setup for the Sabre has always been that the BEC was powered by the flight battery's balance plug. I’ve never had any issues, however, after a friend brought it to my attention, I decided to do some investigation regarding the current draw of my servos on the Sabre.

The concern is that the balance plugs (JST-XH) are rated for low current (2 or 3 Amps, according to the internet) and if my setup is drawing more than that, then eventually something in the connector could heat up enough to cause a failure, resulting in loss of power to the servos, and therefore loss of control of the airplane.

I hooked up my ammeter in series with the BEC and powered the airplane on. At idle (that is, all servos powered but not moving (representative of straight and level flight in smooth air)), it pulled about 1.8A. Cycling the sticks while deploying flaps would pull 5 – 6A, and cycling the sticks while loading servos could spike to 8 – 9A. Granted, this is worst case scenario, and it is only for short periods of time, but this was enough to make me uncomfortable with keeping the balance plug as the input power source for the BEC.

For my reassurance, I built a new power cable that powers the plane (through the Vector’s Power Supply Unit (PSU)), as well as a second set of wires which will power the BEC. The micro Deans connector is what will plug into the BEC now, and these connectors are rated for 10A continuous. With this upgrade, the entire airplane will be powered just by plugging in the flight battery’s Deans plug into this adapter, but I will still be able to power just the BEC for servo checks, just by unplugging the Deans from the PSU.

The New Cable. (The small connector is what is new, compared to the old one)

New (Top) vs. Old (Bottom) Connector


Tuesday, January 9, 2018

Sabre Weight Analysis & Ballast

Since I first measured the components and parts of the Sabre, it has gone through so many iterations of small changes that I can't quite capture everything.

I finally got around to the tedious task of re-measuring all of the components, as well as the important (and previously not done) task of laterally balancing the wing.

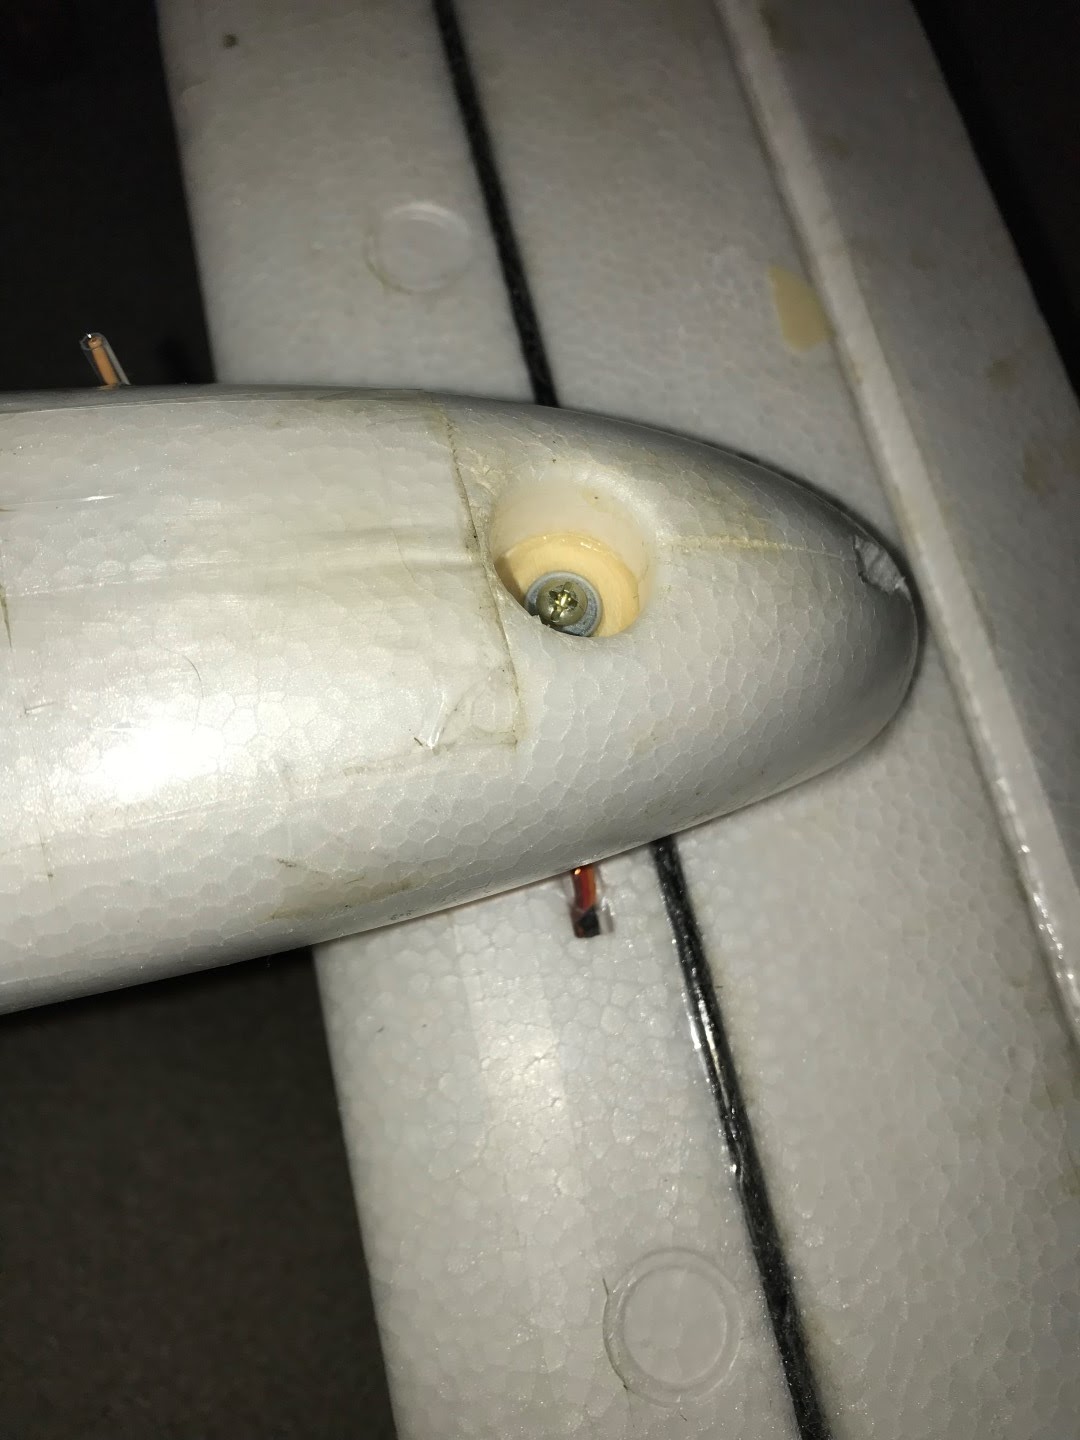
Since the 1.3 GHz video transmitter is so much heavier out on the wing when compared to the 5.8 GHz one I was using, the lateral imbalance was enough to warrant correcting it. I did this by adding coins to it until it balanced, and then carving out a clean hole in the left wingtip to hide the weights away.

I actually made up a process for making the opening, at the right size and depth. I started by tracing the outline of the weights. Then I measured the depth I needed for the set of coins to be flush or slightly submerged under the surface of the wing. I put a wrap of tape on the Exacto at this depth, and cut a grid out of the foam inside the outline of the desired opening. Then I used needle-nosed pliers to pluck each piece of foam out of the grid. This process worked really well, and I will likely find applications for it in the future. For the cover of the weights, I simply used a piece of white card stock and packaging tape.


I also had to make a tail weight for use with flights that use the heavier 16,000 mAh battery. This weight is also made with tape and coins, but it is not as elegant as the wingtip weight. I'll just insert it into the hole in the aft part of the fuselage where the tail pieces attach, and secure it with tape when it is to be used.


I created a matrix of the airplane configurations that are possible, or at least probable with all of my current equipment, and used this to calculate the flight weights.

Overall, the plane is about 7.6 - 8.5 lbs with a 5.8 GHz FPV setup, and 7.7 - 8.7 lbs with a 1.3 GHz setup.