I fell a bit behind on updates to the Sabre and the ground station setup, so this is a long and detailed post.
Anyway, here is a list of updates since the last post:
- Up to 50 flights now
- New FPV camera, the Runcam Eagle 2
- Ground station UHF control repeater has been refined
- Head tracker. It causes the pan/tilt function to correspond to my head movements
- I tried the pan/tilt setup with the Mobius in forward module, looking out the clear "bubble"
- After limited success of the pan/tilt in the forward module, I updated it to be used on top of the fuselage
- I've been trying several new antennas
Here are a few pictures that I like from the last time out:
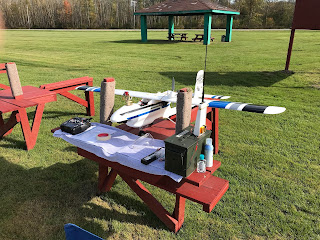 |
| A preparation shot from the last time out with the Sabre. |
 |
| Ready for Takeoff |
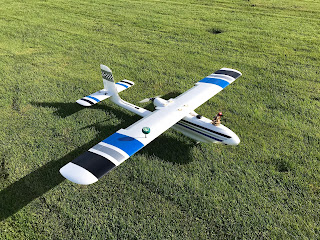 |
| Ready for Takeoff |
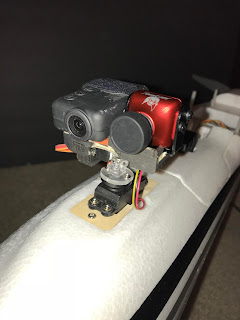
FPV Camera (Runcam Eagle 2):
The Runcam Eagle 2 is considered one of the best FPV cameras currently available. It's a CMOS sensor instead of a CCD, which traditionally, has some bad effects, but this camera has improved those bad effects to the levels of CCD cameras. The dynamic range of this camera is exceptional, resulting in excellent light handling abilities. For example, if the view is facing the sun, the ground doesn't completely black out as a result of the compensation for the bright sun. It is also very customizable, and came with a convenient cable and button setup that plugs into the camera to access its internal settings menus. I'm still working on the settings, but the view is a noticable improvement over my previous camera.
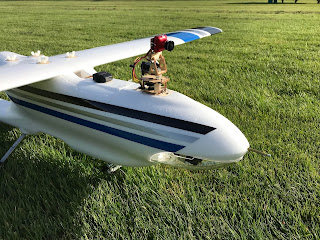 |
| The Runcam Eagle 2 Installed on the Old Pan/Tilt Setup |
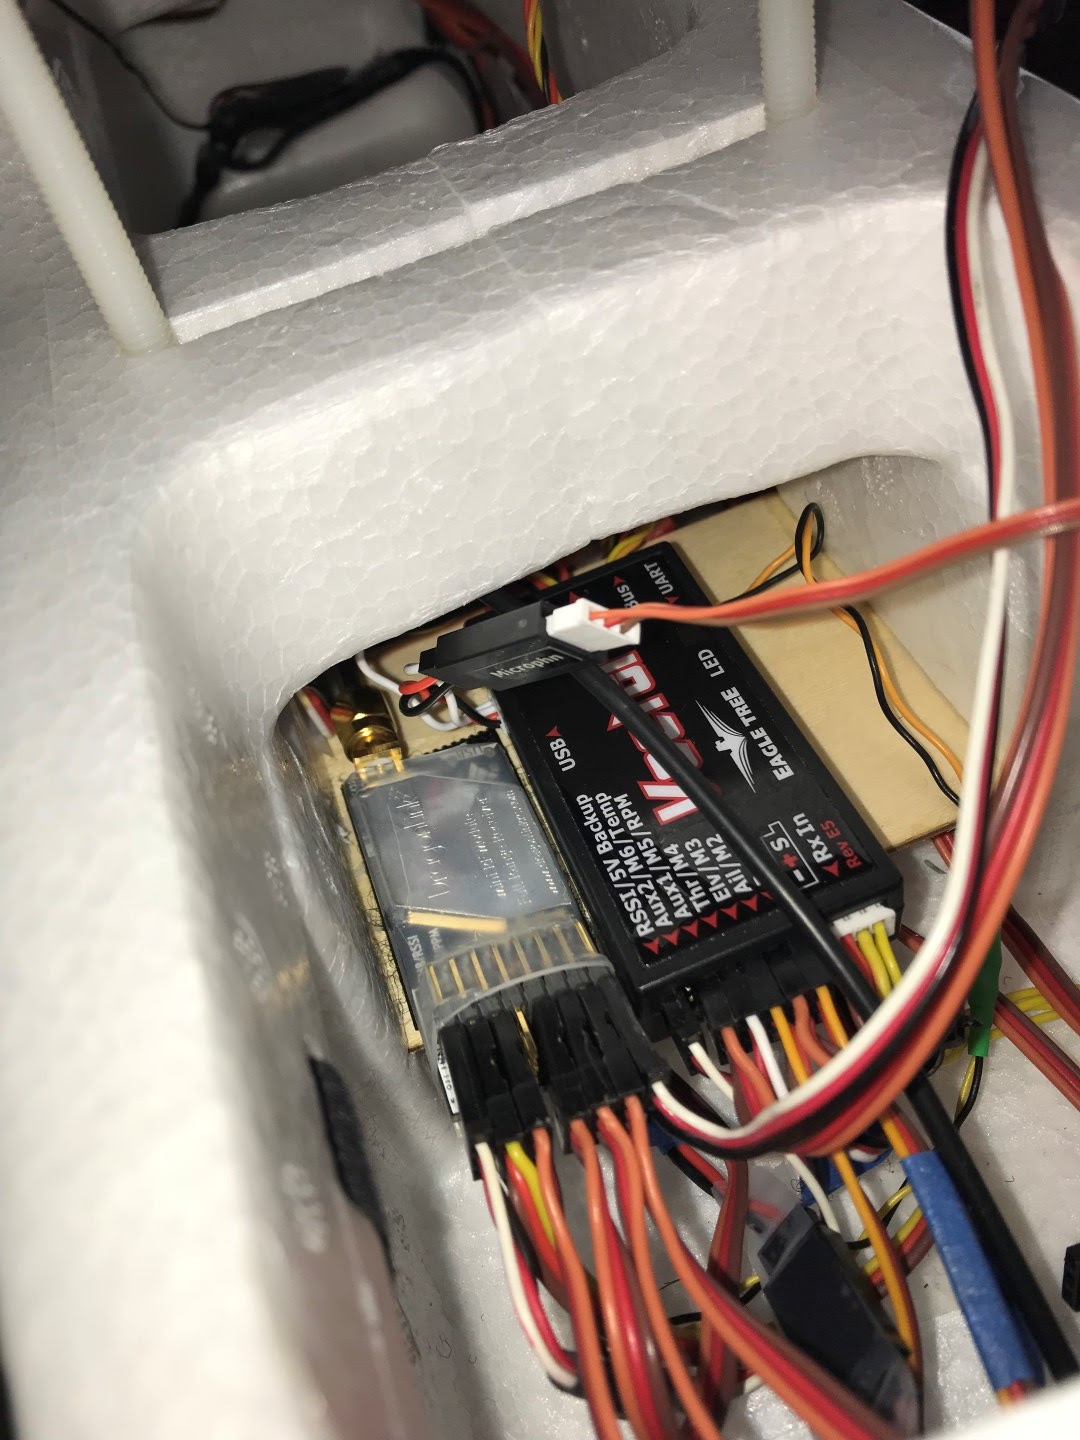
Ground Station Repeater:
I added a BEC to power the ground station repeater. This device is basically nothing more than a voltage regulator. It has two outputs, so I set the output going to the receiver to 5 volts and the output going to the Dragon Link transmitter to 7.2 volts. The advantage of using the BEC is that I can hook up any 2 cell, 3 cell, or 4 cell battery to the input and it will provide the correct (and stable) voltages. In addition, I will be adding a voltage sensor to the ground station, which will be sent to the DX20 live telemetry screen. This will allow me to monitor the voltage of the ground station battery.
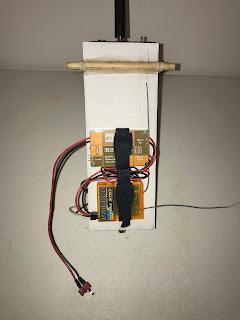 |
| Repeater, Back |
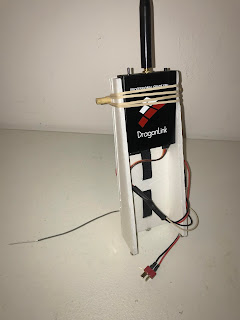 |
| Repeater, Front |
Head Tracker (Trinity):
I bought the Trinity External Head Tracker from Fat Shark. This device mounts on the Headplay and interfaces with the DX20 through the trainer port. Through some programming and configuring, The head tracker can control the pan and tilt to follow my head movements, for a very immersive FPV experience. It is very fun to use when landing FPV. When I'm flying my downwind and base legs of my approach for landing, it's very useful to be able to look out to the side to look at where I am relative to where I will be landing. Using the levers on the back of the transmitter to control pan/tilt while flying the airplane down low for landing is too risky and cumbersome, so the head tracker really adds to the experience here.
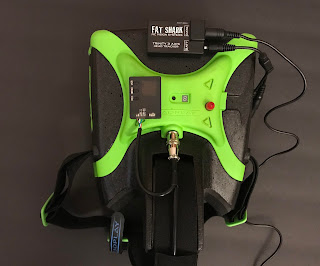 |
| Trinity Head Tracker. It's the black box that says "Fat Shark" on it. |
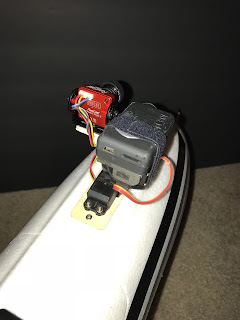
Pan/Tilt Bubble Module:
In addition, I had the head tracker set up to control a new pan/tilt on the plane. The Sabre came with a "module" for the nose that includes a pan/tilt setup. It's designed for the GoPro Hero camera footprint, and it looks downward out of a clear plastic bubble. I modified the mount to accept my Mobius HD camera. The idea is neat, and it looks cool in my opinion, but unfortunately, the views through the bubble were intolerably distorted. There was an obvious rippling effect, and the overall clarity of the video was reduced.
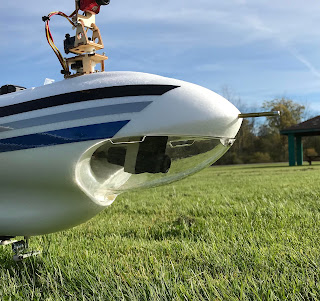 |
| The Mobius on the Pan/Tilt Inside the Bubble |
In order to use this pan/tilt in addition to the FPV camera pan/tilt, I had to use 2 additional channels. That means that 4 channels were being consumed by pan and tilt, and the programming got pretty complicated between setting the head tracker up to control the 4 channels correctly.
Pan/Tilt Refinement:
I decided to reduce the complexity by putting both the Eagle 2 and the Mobius on the same pan/tilt. I modified the one that was in the bubble to mount to the location on top of the fuselage where just the Eagle was mounted before. Both the Mobius and the Eagle fit on there reasonably well. The standard size servo for pan is much smoother than the previous setup with the micro servo. Overall, it's a much more robust, and simpler setup. To top it off, it's also lighter weight than the two separate pan/tilt setups. It will also make for much more interesting HD onboard videos because the Mobius will always be pointing where the FPV view is pointing. My intent is to provide a ground video demonstration of the pan/tilt, as well as the head tracker.
 |
| New Pan/Tilt Setup, Front |
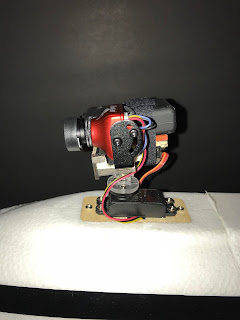 |
| New Pan/Tilt Setup, Side |
 |
| New Pan/Tilt Setup, Rear |
FPV Video Antennas:
I've been experimenting with different video antennas. With all the other changes, it has been difficult to focus on experimenting with the antenna combinations, so it's hard to tell if I have gained any improvement yet. I have the following new antennas, all from Video Aerial Systems:
- Ion (RHCP pair)
- Ion (LHCP)
- Airblade (LHCP pair)
- 3 turn helical (LHCP)
- 10 dBi Crosshair (LHCP)
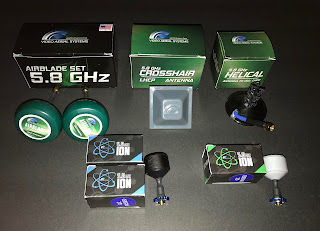 |
| Video Aerial Systems 5.8 GHz Antenna Assortment |
I haven't tried the Crosshair or the LHCP Ion yet, but I have yet to go beyond about 2.1 miles before the video becomes unflyable and I have to turn back. So far, I preferred the pair of Airblades over the pair of Ions, but the flights were done in separate locations on different days, so it's not a good comparison. When flying with the pair of Airblades, I was able to notice better clarity at about 1.5 miles when switching the receiver to the helical. Using the Crosshair should improve on that result further.